Sunday, August 14, 2011

Saturday Nights are different now!


And I am thrilled!  Instead of rattling around the house with nothing on tv, I've been spending the last few babysitting.  Last night was 2-month-old Zoey's first sleepover at Gramma's and the little sweetheart slept through the night and even slept in until 8:15 a.m., much to her mother's chagrin.  Isn't it wonderful to wake up to this smile!

Last weekend, Alex had a turn.  He made a fort with quilts and then pretended it was a train.  I had to sit behind him and be the whistle for a while, but was able to talk him in to letting me get off.


The next morning, I pulled out the old rocking horse that was my brother's and he had a ball pretending he was a cowboy.


Such concentration!


This horse has quite a story.  It was made by prisoners at Oakalla Prison in New Westminster, BC in the early 1960's and shipped to the military base on northern Vancouver Island, where a sister of one of the guards (and we) lived.  She would help sell them so the prisoners could make a little cash.  My brother got it for his first birthday and our children all used it too. Now the next generation is here and using it!  It still has its original paint job and leather ears. I plan on passing it to my brother's daughter when she has her first child, but in the meantime my grandbabies can use it.

Not much has been happening on the quilty front.  I hit a by-the-pound sale at a LQS, and spent way too much money on scraps (they sell off manufacturers samples), but scored about 5 lbs of wonderful batiks, and about 4 lbs of mostly new and unreleased fabrics, including selections of Parisville by Tula Pink, Amy Butler and more.  Here they are piled up in my new wicker laundry basket I got for $5 at a garage sale.  This basket stands about 14" high, and it was almost full!


Here's another perspective, with my foot adding a sense of scale.  Most of the fabrics hide a stack of coordinating fabrics underneath.  This pile extends almost 6 feet.  In case you are wondering, 9 lbs of fabric equals about 22.5 metres or 25 yards of wonderful, glorious scraps!  Now I can create scrappy quilts a la Bonnie Hunter to my heart's content.


While the babies visit and sleep, I do work on my hexagons.  Here is my little kit that I like to travel with, including my punch for more cardboards in case I run out.


I'm still thinking about doing a Red & White challenge, and I'm floating the idea around that I might make blocks from the Midget Blocks, Barbara Brackman's Civil War blocks, and the 100 Block magazines (I have Vol. 2 & 3).  I'll end up with a buch of different size blocks, but I can visualize a pretty fun quilt with sashings of flying geese and other designs.

Sunday, August 7, 2011

Bad blogger update - Garage Sales, the Beach and Free Block Patterns

I am such a bad, bad blogger.  I scan blogs everyday and consider adding a post to mine, then either don't have pictures to upload, or get sidetracked or just plain lazy and I don't post.  Since I do this blog mainly to keep myself accountable and motivated, that means there hasn't been a lot of sewing or crafts or scrapbooking going on!

But I have been doing some fun things.  Yesterday morning I saw this ad in the local paper:


Can you imagine your friends advertising you are a hoarder (that's what one of them actually called her)?! I called my sister and off we went, where the friends were hosting the garage - and they weren't kidding, the driveway was lined with tables on both sides from the front to the back yard, and they weren't shy about talking about their friend's hoard.  It turns out she used to own a shop, and a lot of the stuff was leftover from those days.  And so were the prices - only about 50% of the original retail price, which in my opinion is not a garage sale price. Needless to say, I left without getting a thing - I can buy a lot of the same or new stuff cheaper on the 'net.  I overheard one friend tell someone they were trying to help her recover her costs.  Unless she was dire straits, I consider a garage sale a way to save the environment by passing on usable stuff at ridiculously low prices.  In fact, I don't even hold garage sales anymore, I just give my stuff to charity.

Here in BC the first Monday of August is a statutory holiday called BC Day.  Since summer seems to have only started around here on the weekend before (July 23rd), we couldn't wait to spend the day at the beach.  My kids and grandkids and I all headed for White Rock, a beautiful beach on the ocean just south of Vancouver and only about an hour from home.  Can you imagine having this view from your home?


Across the bay is Washington State.

These homes run upwards of $1,000,000 and more!


The rock is how White Rock got its name.  Apparently, it is a erratic boulder left by glaciation and was white from guano by seagulls over the millenia. It is even featured in the local natives' legends. Now, it gets painted regularly by the city to hide graffiti. (This is one of my infamous UBIs, as my friends and kids would say! UBIs = useless bits of information)


Sarah dipped Zoey's toes in the ocean for the very first time. She is such a water baby - she just splashed around. She is now seven weeks old in this picture.  Her little friend Logan, who is 3 weeks younger just curled his toes up almost behind his ears !  No way was he putting his toes in.  I can't post that picture cuz I don't have permission yet from his mommy.


Alex took his time to warm up to the beach and the ocean - it's been a year since he last got on the beach because of our poor weather this year.  He loved taking pictures with his camera, though.  A future scrapbooker maybe?

I haven't done much on the quilty front.  I have made more hexagon flowers - I love a portable project!  I also found a block I had done 3 years ago, which was the beginning of  another project that I wanted to do eventually. It's called Midget Blocks and the patterns come from Gay at Sentimental Stitches.  I had forgotten about it because I had saved the .pdfs on my old computer, which was stolen when my home was broken in to almost 2 years ago.

Here is the one and only block I had completed.  Just like Gay's original find, I wanted to name each block in the sashing, but knew I would never stick to hand-embroidering each one, so I used my sewing machine's embroidery feature to put the name in the sashing.  I'm not crazy about the look, but that was before I knew about stabilizers.


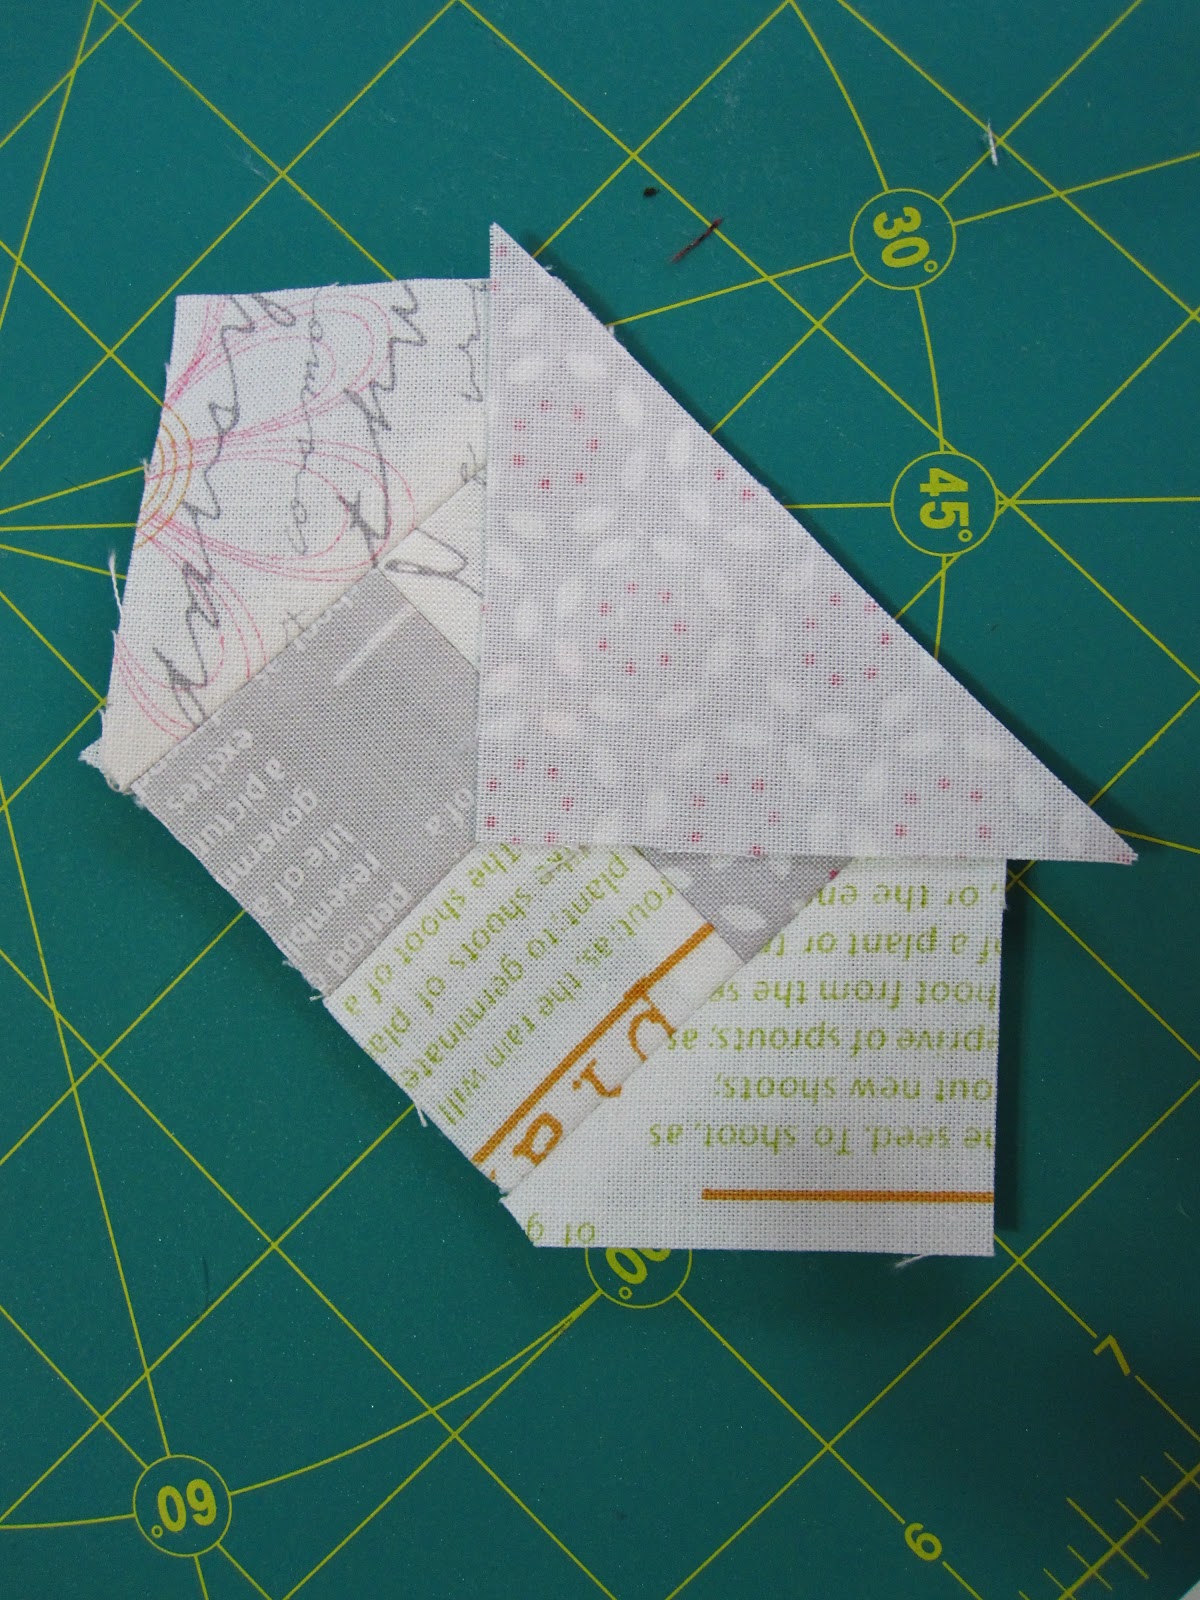
I learned a lot doing this block. This is the first foundation-pieced block I've ever attempted.  I liked the process, and felt confident enough to take a class from Judy Niemeyer, the queen of foundation piecing!  I also made this block before I knew enough to trim the seam allowances on this very small block (finished size 4 1/2") to 1/8".  Check out this back - very ugly!


I pride myself in having neat backs on all my craft work, so I wasn't very happy with this result.  That's probably why I put it aside.  Thank goodness for the internet and my LSS, I feel my skills have improved so much in the last couple of years that I'm ready to tackle this again. Gay is redoing her blocks in Red & White, inspired by the Infinite Variety Quilt Show in New York, and I think I'm going to do the same!  Is any one up to a challenge starting in September?  Here's a link to Gay's free Midget Blocks patterns if you are interested in joining me.

Sunday, July 3, 2011

Happy Holiday Weekend!

Happy Canada Day weekend to my fellow Canadians and Happy Independance Day to my American friends!  Yesterday we finally had a summer day, the first one this year, and today we're back to rain this morning and clouds this afternoon.  My backyard is looking more like a hayfield than a lawn, maybe I should have a pet goat instead of a dog. Of all the jobs around the house, I hate mowing the lawn the most (the downside of being single, I guess).

Not much has been happening on the sewing front between work, babysitting Alex and visiting Zoey (and her parents).  I did get Alex's I-spy quilt top put together and he helped me pin-baste it.


I gave Sarah the quilt and crib skirt I made for the baby, but before it went in the crib I had to take a few pictures!  She is eight days old in these pictures.


Here she is in the crib - the skirt is double-tiered and the bottom layer can come off when they drop the mattress to the lower level.


One last picture that makes me giggle.  Zoey tries really hard to focus on her nose and we were able to capture the shot! 

Saturday, June 18, 2011

Baby Update

It's been a long, busy week but I think we're finally settling into a routine.  My daughter, Sarah, did amazingly well through a long, hard natural childbirth (40 hours from the time she was induced); came through it with a few stitches and is a patient, calm mother!  Baby Zoey is struggling with breastfeeding, and has some jaundice, but is doing well otherwise.  She is Sarah and Rob's first, and the way they are with her, you would think it was their 10th.  Here's a few more pictures.


My other daughter, Brianna, waited until Sarah and Zoey were home to introduce her to her cousin, Alex, age 2 3/4.  At first, he wasn't too sure how to hold her but it didn't take long for him to fall in love.


This is my new all-time favourite picture!

He still has a hard time remembering her name because we referred to her as Baby No Name for so long!

Zoey seems to be asleep all the time, mostly due to the jaundice, but she makes lots of faces.  This one is my favourite.


She lost 11 oz. before leaving the hospital, but gained 2 oz. back the first day.  The health nurse comes to the house the day after release, to weigh her and see how she is doing.  It was a great chance to see her with her eyes open.


Welcome home, Baby Zoey, we love you lots!

Tuesday, June 14, 2011

She's here (i'm a little late posting this)

Just a short post with a picture of my beautiful granddaughter, Zoey Marie, weighing 8 lbs, 7 oz.  She took her time getting here but was totally worth the wait.  She's already acting like a princess and wants her food handed to her on the proverbial silver platter, but I'm sure she'll get the hang of things soon.  Between work and the hospital, I've been pretty busy but I'll be back with more pictures tomorrow!

Wednesday, June 8, 2011

Still waiting for a baby...

My new granddaughter is proving to be just as stubborn as her mother - she is now a week late!  If no baby by Friday, my daughter will probably be induced (as long as the hospital has room). 

To keep my mind off of things, I decided to make a trial block for my Sunkissed quilt.  The overwhelming consensus was to do a Snail Trail (also known as Parasols or Virginia Reel). The patterns I could find all involved 1/8" and 1/16" measurements so I decided to wing it!  Here's a photo story on what I did:


First, I wanted a block between about 6 1/2-9", tough to find a pattern that size so I "guesstimated" the starting strip by looking a few book patterns.  I started by cutting 1 1/4" strips from 4 different fabrics.  (Part of my Sunkissed stash included some sample pieces bought from my local quilt shop - they sell off the samples they receive from the manufacturers pretty cheap so I started with those).  I sewed the strips together in pairs, then cut a 1 1/4" piece of the end of each each and sewed the two pieces together to make a 4-patch that finished at 2 inches including seam allowances. I also pressed the seams open to avoid any problems later on.


 Now comes the tricky part, calculating the size of block to cut for the triangular pieces.  I measured one size (2") and subtracted 1/2" to figure out what the finished size will be (1 1/2").  Then I added 3/8" to the finished size for a measurement of 1 7/8".  I cut that size block from each of the 4 fabrics, then cut each in half from corner to corner. You have to add that extra little smidge to account for cutting the block in half to make a Half-Square Triangle (HST). I sewed two opposite sides first, matching it to the block of the same fabric, then trimmed off the dog ears. I used one (HST) from each fabric and put the other aside for use in another block.


I labelled it to make it easy to use later on.  My Snail Trails will have 5 rounds in total.

Next, I pressed all my seams open before adding the other two HSTs.


I wasn't perfect getting the triangles centred on the seam, but the next step fixed that!


You can see that by making the HST block a little larger, it hangs over the edge of the adjoining triangle, which will leave you with a proper seam allowance.


Round 2 is now complete! I squared it up and moved to the next round.  I measured one side, figured out the finished size and added 3/8" to calculate my next block at 3 1/4".


Can you see my mistake?  I put the HST on the wrong side.  When I attached my first set of triangles, they "move" to the left of the original square. That means when I'm attaching the next round, I have to keep the same "movement" to the left.  Instead, I went right.  Time to pull out the seam ripper!


Now that Round 3 is complete, it's time to square it up.  I lined up my ruler centering it on the four-patch in the center first, then adjusting it so that I am trimming it down to 1/4" seam allowance from the point where the triangles cross. See the close-up below:


My block now measures 4 1/2", finishes at 4" so my next set of HSTs are cut from a 4 3/8" square.  Round 4 makes a 6 1/4" block, finishing at 5 3/4.  Now I was starting to get nervous because I needed to cut
6 1/8" squares and my fabric sampler pieces didn't look big enough.  However, with some careful cutting and even more careful sewing, I was able to squeak them out!


Here you can see that the one side is pretty skimpy compared to the other side (the grey ones were skimpy too).   But once it was all trimmed up, I had an 8 5/8" block - perfectly fits right at the size I wanted!


At this point, I remembered that I don't want the same colour darker value in each block - drat!  I guess that's why they call it a trial block.  I'll keep it in case I need it to finish the quilt.  I love how it looks and for me, it's easier to cut the HSTs as I go, instead of a whole bunch at once.  Because I'm trimming them up as I go, I also don't have to be finicky on those pesky 3/8" measurements.  As long as I'm doing my squaring up, I should be good!  Now I just have to calculated how many I need to make a double-size quilt.


Monday, June 6, 2011

Waiting (im)patiently...

My daughter was due on June 1st with her first baby (a girl) and she might be in labour!  She had a non-stress test at the hospital today, and she was having contractions about 8 minutes apart, but she's not in any pain, so we're not sure yet.  We just got back from an hour-long walk and she had a couple of strong ones, but she is handling it so well.  I hope this is an indication how she handles the tough part.

 I remembered that I missed having some handwork during the wee hours of my first daughter's labour, when she was resting, so I dug out my hexies.  They've been put away for a few months while I worked on baby stuff.  I needed to prep some more flower groups so first I had to punch some more cardstock hexagons with my Creative Memories punch. I also punch a hole in the centre to make it easy to take out and reuse it.
  
The hexagon on the left is my cutting template.  I cut my hexies out of 2" and 2 1/2" strips, which minimizes waste.  Here is my little bin of precut strips - I've reused a veggie and dip container, the little hole for the dip is perfect for some precut hexies and my cutting template.


I'm using my collection of '30s reproductions to make the flowers and because I want each one different, I pulled out the ones I've already completed:


I have completed 59 so far.  As you can see, I've started putting the flowers together in groups.  I didn't want to use a traditional setting so I'm starting with groups of 9 flowers, one from each colour group so they will be well-distributed amongst the finished quilt. Every flower is different, if the "petals" are the same, the centre has to be different. Here's my prepped flowers ready to go for the trip to the hospital!


I'm following the Hexagon tutorial from Bonnie Hunter's blog - I've done hexies before, but the joining of so many small units bored me silly.  Now by doing a hexie and joining it to a flower right away, I have a sense of completion each time I do one. It takes me less than an hour to finish one flower.  Here is the back when it is done:


I won't remove the templates until they are joined to other flowers.  When I started making the hexies, I needed a case for my needles and pins, so I made a hexagon one using my selvages and a vintage button from my mother's collection.


When I was punching my cardstock, I looked at my smaller punch and wondered how small of a hexie I could make.  I pulled out my smaller punch (also from Creative Memories) and punched out the smallest size hexie, with a finished size of  3/4".  Each side is just 3/8".  (My regular size hexies finish at 1 1/2", with 3/4" sides.  The flower is just the cutest, but I don't know how many I would make - maybe enough for a doll house quilt.  Here it is with a spool of thread to show you how little it is:


And with one of my regular hexagons - which looks so big beside it!


Well, I'm off to bed to get some sleep. Hopefully, that little girl makes her arrival soon!